So today was a very cool and soggy one here in Washington. So the question most mommy's want answered is what they should do with their little ones to entertain. Well I for one don't believe that you'll melt in the rain, so if we can take a fun little trip outside in between down pours then I'm happy to do it in the name of crafting.
Unfortunately, Ilybug and I have found it difficult to get out to do much of anything with Boogerbutt being a typical 4 month old and wanting mommy a lot. So today I got a little creative and snuck some mommy daughter time in. While driving home from running errands, I asked my husband to drop Ilybug and I off at the end of the road so that we could walk and gather leaves for our project. With Boogerbutt in the back sleeping, it was a piece of cake to sneak this special time in. So mommy's out there who don't get enough time with their older children, there are ways, you just might have to think outside of the box. Anyways, I made sure to get some pictures of our leaf project we came up with. So without further ado...
Supplies:
Clear vinyl shelf liner (Found at Dollar tree)
Scissors
Leaves
Optional:
Glitter
Confetti
Any other items you may want to add
Step 1: Find leaves, any shape or color will do. Use your imagination and find some fun ones that have multiple colors on it. Or try and find one for each color of the rainbow... or the autumn version of a rainbow. We found a great ditch that had lots of bright colored leaves in it.

So my brave daughter took off ankle deep in it to pick out the best of the best leaves.

If you can't find what you're looking for on the ground, chin up because there just may be the perfect one hanging loosely on a tree nearby. Like these ones here, we had in our front yard, we couldn't resist the bright reds, oranges, and yellows on it.

And with bucket in hand, we filled it to the brim, although in actuality we only used a fraction of those. But hey, who knows what we will come up with for the rest. But if you only find a few beautiful leaves, that is perfect.

Step 2: Dry the leaves. There's a few ways to do this, we tried a couple
different ones. The first way we tried was to lay them out
overnight to dry. But use caution with this method as they can get too dry and brittle when left out too long.

The alternative is the way I prefer which is to use a blow dryer and just put a little air over them to remove the excess moisture. Since I have no patience, and my daughter takes after me in this aspect, it's a great quick way to move forward in the project.

Step 3: Make sure you have all your supplies ready. Now you can go as big or small as you want with this step. We went down into our craft room and gathered some glitter and confetti to add to ours as well. I also thought crayon shavings may be fun, you may even be able to place a little heat on it and melt them to make a really neat creation. (I think I see a future project for us as we have extra vinyl left over and bought an extra roll. Can't beat $1 projects!!)

Step 4: Cut two vinyl sheets (same size) as big as you want, I went about the size of a place mat (which it can be used as since it's vinyl and made to protect your surfaces), although I think cutting it to fit in a picture frame would be an excellent option as well. Then peel one of them and lay it sticky side up.

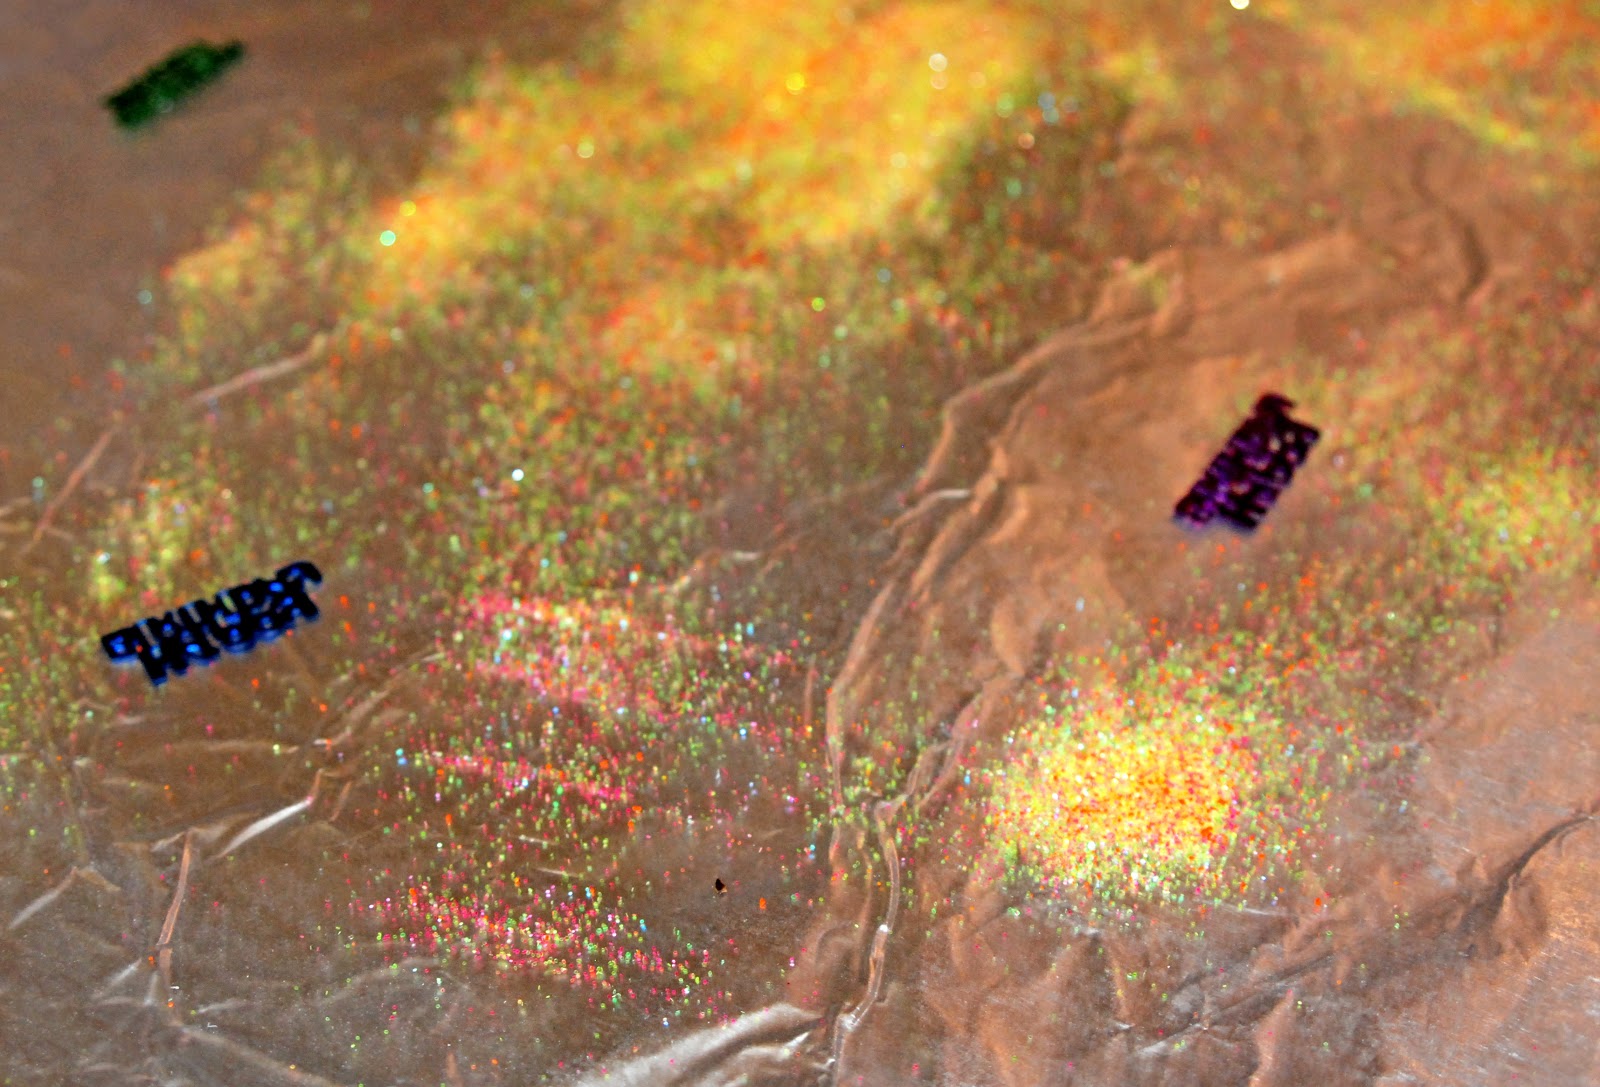
Step 5: Decorate in any way you see fit. I think having your child color some small pictures or even color on clear acetate or you write a cute message on the acetate to stick in it would be a great idea. Even maybe doing the date on it so it doesn't distract from your finished craft. Again there really is no wrong way to do this. We chose to do glitter first, and since my daughter had left over mixed glitter we used that in a baggie, with a spoon to sprinkle it around. And I know what your thinking, it'll get EVERYWHERE, but that's the beauty of this stuff. Once the glitter lands it sticks, so that makes for easy clean up. But luckily it's not too sticky so if you want to pull something up to replace it, that's not a problem with this either. It's very versatile.

The next thing we added was some Happy Birthday confetti since Dad's B-day is coming up in a few days.
Now a little trick before using your leaves, cut the stems off of them, it makes it a lot easier to smooth down.

Add your leaves in any order you want, just make sure your leaves are all facing the same way so you get the colorful side showing for all of them.

Step 6: Take your second sheet of vinyl and peel it. I recommend having an extra set of adult hands for this step as it makes it easier to align and stick all the sides together. Thank you to my hubby for lending his help.

Step 7: Smooth out and enjoy! At this point you can trim any uneven edges. I think putting it into a frame, even maybe on top of a collage or picture of your child the age they are when they made it as a fun way of remembering how old they were when they created this masterpiece. Or again, just have fun and get creative.


One thing is for sure, and that's that your little one will be proud of the work they did. Plus they get to carry around their favorite leaves with them.

Ilybug decided she wanted hers put on the fridge, so she could stick magnets to the different leaves. And it kept her entertained for a good chunk of time trying to stick different magnets to the different leaves and places on the mat.


Well that's it, not too shabby for $1 huh? It's easy, it's inexpensive, and there's a million different ways to use it. I definitely recommend having a roll of clear vinyl in your craft closet to pull out on rainy days. I will definitely be using more of it in the future. And I can't wait to see how it holds up to all the tests we will be throwing at it. I will definitely share our finds with you. And I would love to see what you come up with too. Feel free to share your blog, or links in the comments to see the masterpieces you and your kids come up with. Enjoy!
No comments:
Post a Comment